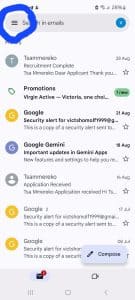
Step 1: Go to your Gmail
Open your Gmail app on your phone or go to the Gmail website on your computer. This is where you will start the process of adding a new email account.

Step 2: Click on the menu icon bar
Look at the top left corner of your Gmail screen. You will see three small horizontal lines (also called the hamburger menu, next to the search bar). Click on it to open the side menu.
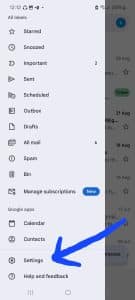
Step 3: Scroll down to Settings
In the menu that opens, scroll all the way down until you see the option called “Settings.” Tap on it to go into your Gmail settings.
Step 4: Click on Add account
Inside the settings menu, you will see different options. Choose “Add account” so you can add another email account to your Gmail app.

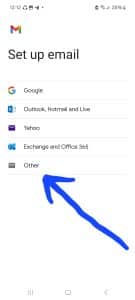
Step 5: Click on Other
Gmail will give you several choices like Google, Outlook, Yahoo, etc. Since this is not a Google account, choose “Other.”
Step 6: Enter your email address and click Next
Type in the email address you want to add. After entering it correctly, click on “Next.”

Step 7: Click on Personal (IMAP)
Gmail will ask how you want to set up the account. Select “Personal (IMAP)” because this allows you to access your emails across different devices while keeping them stored on the server.

Step 8: Add your password and click Next
Enter the password for your email account. After typing it in correctly, click on “Next.”

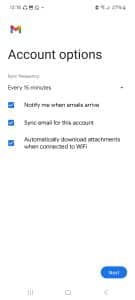
Step 9: Incoming and Outgoing server settings
If you typed the correct email and password, you will not see any red error messages. Just leave the settings as they are and click “Next” for both incoming and outgoing server settings.


Step 10: Click on Next
After confirming the server settings, simply click on “Next” to continue with the setup.
Step 11: Enter your display name
At this stage, Gmail will ask you to type in a name. This is the name that people will see when they receive your emails, so it is important to enter it correctly.
👉 Make sure you enter both your name and your company name so the recipient will immediately know who the email is coming from and which company you represent.
Example: Tsholo – WebMechanics
After entering the name, click on “Next.”


Step 12: Go back to your email
Now the setup is complete 🎉. You can go back to your Gmail inbox and start using your newly added email account.